

Embroidery machines have changed the way we bring designs to life, making it possible to turn digital artwork into stunning stitched creations. If you’ve ever wanted to transform your company logo or personal design into embroidery, a PES File Converter is the key tool you need. PES files are one of the most widely used embroidery formats, especially for Brother and Baby Lock machines, and having a reliable converter ensures your artwork is transformed into precise, machine-readable stitch data.
In this guide, we’ll break down what PES files are, why a converter is so important, and how businesses, crafters, and embroidery enthusiasts can benefit from turning logos into stitch-ready files.
What Is a PES File?
A PES file is a specific embroidery file format used by popular machine brands like Brother and Baby Lock. Unlike standard image files such as JPG or PNG, PES files contain stitch instructions:
- Where each stitch starts and ends
- The type of stitches to be used (satin, fill, running)
- The sequence of color changes
- Thread density and direction
In short, a PES file tells your embroidery machine exactly how to recreate your design on fabric, down to the smallest detail.
Why Use a PES File Converter?
Not all designs start in PES format. Logos, illustrations, and artwork usually begin as vector files (AI, SVG, EPS) or raster images (JPG, PNG). That’s where a PES File Converter comes in. It bridges the gap between standard digital artwork and embroidery machines.
Here’s why a converter is crucial:
- File Compatibility – Ensures your design works seamlessly with Brother or Baby Lock machines.
- Accuracy – Converts artwork into clean stitch paths without distortions.
- Efficiency – Saves time by automating parts of the conversion process.
- Scalability – Allows resizing without losing stitch quality.
The Process of Converting Logos into PES Files
Turning a logo into an embroidery-ready PES file is more than just saving it in a different format. It involves digitizing. Here’s a breakdown of the process:
Step 1: Artwork Preparation
Clean, high-quality logos are ideal. A blurry or low-resolution image may result in poor stitching quality.
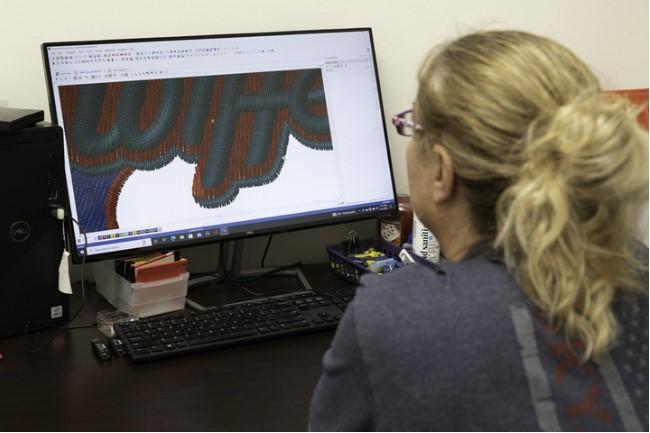
Step 2: Digitizing with Software
A professional digitizer uses software to map out stitches. They determine stitch types, directions, underlay, and density.
Step 3: PES File Conversion
The digitized design is then saved in PES format, ready to be loaded into your embroidery machine.
Step 4: Test Stitch-Out
Before production, a test run is stitched to ensure everything looks perfect and adjustments can be made if needed.
Common Challenges in PES File Conversion
While PES conversion sounds simple, it comes with a few challenges that make professional help valuable:
- Text Clarity – Small fonts may not stitch well without adjustments.
- Complex Logos – Highly detailed designs may need simplification for embroidery.
- Fabric Differences – A design digitized for denim may not stitch correctly on silk.
- Thread Breaks – Poorly digitized files can cause unnecessary machine stoppages.
This is why relying on experienced digitizers, instead of just free auto-converters, often produces far superior results.
Benefits of Professional PES Conversion for Logos
Hiring professionals to convert your logo into PES format ensures:
- Crisp, detailed designs that stitch cleanly on different fabrics.
- Optimized stitch paths for faster machine runs.
- Durability with proper underlay and stitch density.
- Scalability, so your logo looks good whether it’s on a cap, shirt, or large banner.
Who Needs a PES File Converter?
PES conversion is valuable for:
- Small Businesses – For branding uniforms, promotional items, and merchandise.
- Sports Teams – To embroider team logos on jerseys, caps, and gear.
- Crafters & Hobbyists – For personal projects like monograms, gifts, and décor.
- Promotional Companies – To offer embroidery services with consistent results.
File Formats Related to PES
Though PES is common, other embroidery file formats are also widely used. Here’s a quick list:
- DST – Standard for Tajima machines
- JEF – For Janome embroidery machines
- EXP – Used by Melco and Bernina machines
- VP3 – For Husqvarna and Pfaff embroidery machines
If you plan to expand your embroidery work, it’s helpful to know how to convert across multiple formats.
DIY vs. Professional PES Conversion
Free or automated converters may seem appealing, but they often lack the precision needed for embroidery. For example:
- Automated tools may create unnecessary jump stitches.
- Small details often get lost.
- Thread tension and density may be ignored.
In contrast, professional PES conversion ensures your logo looks sharp, stitches efficiently, and lasts through wear and washing.
Tips for Best Results When Converting Logos
- Always provide high-resolution artwork.
- Choose bold fonts for clarity in embroidery.
- Consider fabric type before conversion.
- Run a test stitch-out before full production.
Final Thoughts
A PES File Converter is essential for turning logos and artwork into embroidery-ready files. While automated tools exist, nothing beats the precision of professional digitizing, especially when your logo represents your brand. With the right conversion, your designs can shine on apparel, accessories, and promotional products with crisp, durable stitching.
If you want flawless results and a reliable partner for PES file conversions, Digitizing Buddy is the name many businesses and creators trust for expert embroidery digitizing services.


